While I was up at Van's Aircraft I noticed that both of the factory RV-12 airplanes had a new fuel gauge system mount on them. This replaced the old sight window in the side of the tank.
The new gauge is not only being offered on the new kits but is also available as a retrofit on existing tanks for around $70 at the time of this posting. Its part number is "12 fuel tank mod". This is a cool addition as now one can tell how full the fuel tank is while filling it up.
Kind of wish I hadn't built my fuel tank. But I think it is worth the extra work. I will make sure to document my experience with the installation.
Thursday, October 3, 2013
Tuesday, October 1, 2013
Vans Aircraft RV-12 Airplane Build, Sections 42D: SkyView Update (part 3)
Reference: pages 42D-19; 1.5 hours
I'm starting back into the wiring update for the SkyView EFIS on the RV-12 aircraft.
Step 1: Attach the WH-00036 Tunnel Conversion Harness to the WH-RV12-Tunnel harness using the ES-00164 D-Cub Backshell Interconnects. Place a drop of blue Loctite on the threads of each thumb screw then fully tighten then into the d-sub backshell interconnects.
I actually did this while attaching the tailcone, because I needed some of the wiring for the tailcone before attaching it.
Step 2: Attach the WH-00026 Option Conversion Harness to the WH-RV12-Optional Harness using D-Sub Backshell Interconnects. Place a drop of blue Loctite on the threads of each thumb screw the fully tighten them into the d-sub backshell interconnects.
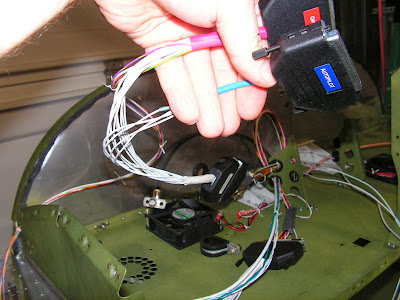
Step 3 & 4: Deal with adding the cushion clamp and Tie-wrapping the harnesses. I will complete these after all the wires are ran.
Step 5 (lighting kit installed): Find the WH-L435 (YEL/PRP) and WH-L436(YEL/GRN) wires coming from the WH-0026 RV-12 Option Conversion Harness. Dut both wires three inches from the d-sub connector they are attached to. Cover the end of each wire in heat shrink.
Builder's note: I just removed them from the harness.
Step 6: There are several long wires left coming from the WH-00026 Option COnversion Harness and WH-00036 Tunnel Conversion Harness. Route these wires down through a snap bushing in the Panel Base then follow the path of the WH-RV12-TUNNEL harness theough the to the F-1202F Bulkhead. Use the new wire run holes made in this section to route the harness to the aft side of the F-1203A Bulkhead.
That catches the RV-12 up to date. With the weather turning colder I may jump over to the canopy and finish it up before it's too hard to heat the grage up to 70 degrees. So long until next time!
Labels:
RV-12 page 42D-19,
RV12,
RV12 aircraft,
RV12 Avionics,
RV12 Skyview
Subscribe to:
Posts (Atom)