Today was the big move of the RV-12 airplane from the warehouse to the airport. First I moved the wings using my Tacoma truck and the rack pictured below. It sits on the rack with the spar pointing forward into the truck cabin.
Next I rented a 17 foot U Haul truck to move the fuselage.The two outside ramps are the same length as the truck ramp.
Then with a little help it was time to install the wings.
That's it for todays work.
Wednesday, July 29, 2015
Vans Aircraft RV-12 Airplane Build: Final Assembly (part 11) New Vernier Throttle
Reference: Notifications 14/09/24 and 14/09/25; 3.5 hours
Had a nice visit with Ken Scott at Van's Aircraft yesterday about flying the RV-12 and he suggested going to the new vernier throttle. The reasoning is this, on final approach the RV-12 need to be slown down, however the old throttle would creep forward and increase the engine rpm especially with the older Rotax throttle springs. After flying 50 plus hours with the old throttle he was surprised at what a difference the new vernier throttle made.
So today I'm removing the old throttle and installing the new setup which includes the new carburetor springs.
Out with the old.,br/>
Builder's note: The new throttle is a larger diameter than the old one. And the hole needs to be moved downward to allow the nut the backside of the control panel to turn freely and not interfere with the instrument panel floor. So I used a Dremel to enlarge the hole and lower it off center. Ithink the new panels have this clearance issue solved.
Of course the firewall needs to be resealed with fire proofing.
And the extra cable cut off.
New springs installed and the throttle cables rigged per page 50-05 and 50-06.
The new throttle cable comes pre-labeled. So that's one less thing to worry about. This complete this entry and installation of Notification 14/09/24 and 14/09/25 and page 50-05 and 50-06. The feel of the new vernier throttle cable is great!
Saturday, July 25, 2015
Vans Aircraft RV-12 Airplane Build: Final Assembly (part 10) SB 15-03-05
Reference: Pages 50-05, 50-06; 5.0 hours
Today's work on the RV-12 involved installing the air cleaners and installing the new carburetor floats for Service Bulletin 15-03-05. My RV-12 engine was effect by this due to the serial number range of the carburetors. I ordered the floats back in March, April and they finally arrived this week.
Builder's note: Note lack of marks on old floats in picture above. New floats and gaskets are pictured below.
Reference: Builder's note: I wanted to hid the exposed fiberglass that shows through the inside of the canopy. SO I purchased black contact paper from Home Depot, cut patterns and the cover the area to mach the curve of the layup.
This concludes this entry for working on the RV-12 airplane.
Friday, July 24, 2015
Vans Aircraft RV-12 Airplane Build: Final Assembly (part 9) Old Notification Completion
Reference: Notifications dated 8/31/12 and 2/11/13; 1.5 hours
I've been going through and checking the documentation of all the service bulletin and notifications for the RV-12 and preparing logbook entries for these. In my search, I came across two older notifications dealing with the electrical harness. Both apply to my RV-12 airplane because of the date these harnesses were received.
UPDATE: There is a GOTCHA for Notification 2/11/13. Even though my harness fit the dates of the Notification, so I changed the wires, the harness was correct before the change. Swapping the wires caused the problem outlined in the notification. So check the light operation first before changing the wiring!
Reference: Notification dated 8/31/12
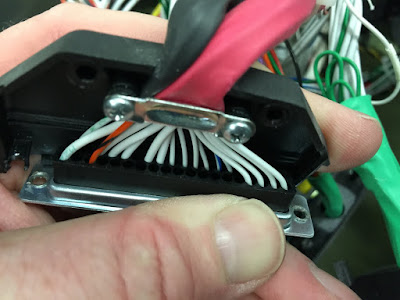
This notification requires swapping two of the wires in the WH-00045 or WH-00026 harness. It depends on which Skyview harness system you have. Mine is the older conversion from the D-180 EFIS to the Skyview so it involves the WH-00026.
In light of the problem I had with the other wiring notification I called Van's to find out if there was any test that would show if these two wires needed changing or not. I was told if the wires are backwards then the Skyveiw will give a 4/8 error message.
Reference: Notification dated 2/11/13
This notification dealt with to wires that needed to be changed in the lighting harness WH-00031. Again my airplane was included because the harness was received before 2/11/13. The two wire are extracted using a extractor tool and swapped.
As noted above: I had to reverse the wires back to the original configuration as my wiring harness was wired correctly to start with.
This completes the work and rework for these two notifications on the RV-12 airplane.
I've been going through and checking the documentation of all the service bulletin and notifications for the RV-12 and preparing logbook entries for these. In my search, I came across two older notifications dealing with the electrical harness. Both apply to my RV-12 airplane because of the date these harnesses were received.
UPDATE: There is a GOTCHA for Notification 2/11/13. Even though my harness fit the dates of the Notification, so I changed the wires, the harness was correct before the change. Swapping the wires caused the problem outlined in the notification. So check the light operation first before changing the wiring!
Reference: Notification dated 8/31/12
This notification requires swapping two of the wires in the WH-00045 or WH-00026 harness. It depends on which Skyview harness system you have. Mine is the older conversion from the D-180 EFIS to the Skyview so it involves the WH-00026.
In light of the problem I had with the other wiring notification I called Van's to find out if there was any test that would show if these two wires needed changing or not. I was told if the wires are backwards then the Skyveiw will give a 4/8 error message.
Reference: Notification dated 2/11/13
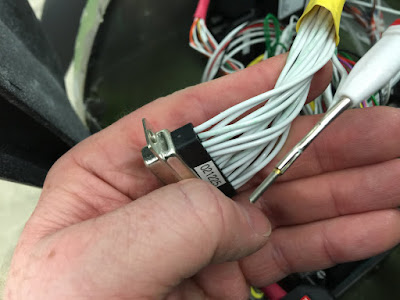
This notification dealt with to wires that needed to be changed in the lighting harness WH-00031. Again my airplane was included because the harness was received before 2/11/13. The two wire are extracted using a extractor tool and swapped.
As noted above: I had to reverse the wires back to the original configuration as my wiring harness was wired correctly to start with.
This completes the work and rework for these two notifications on the RV-12 airplane.
Tuesday, July 21, 2015
Vans Aircraft RV-12 Airplane Build: Final Assembly (part 8)
Reference: Interior Instructions 3.5 hours
My wife really liked the look of the full interior kit for the RV-12 airplane so today will show the steps of how I did it. If you are wondering it to total kit (not including the seats) adds ~12 pound to the airplane.
Builder' note: the picture below show how I had to cut the back panel to accommodate to newer fuel vent system.
This completes the install of the RV-12's interior. Of course most, if not all, of it will come back out for the DAR inspection.
Saturday, July 18, 2015
Vans Aircraft RV-12 Airplane Build: Final Assembly (part 7)
Reference: Pages 33-04, 51A-05, 31A-09; 1.0 hours
Today is another mixed bag of small projects on the RV-12 airplane. These include installing the anti-slip material on the steps, Attaching the ID plate and installing the wing electrical interconnects covers. For the ID Data Plate I had it engraved by a local trophy shop. I did talk to the DAR inspector I will be using to come up with the information he expected to see on the data plate.
This completes today's work on the RV-12.
Saturday, July 11, 2015
Vans Aircraft RV-12 Airplane Build: Final Assembly (part 6) & Dynon Skyview Setup
Reference: Pages 47-07, 47-05, SB 14-05-22, 46-14 53-10; 6.0 hours
Today was a big work day for the RV-12. Van's has come up with a new gauge for pitching the prop and it is really cool! Most of the other projects centered around the Skyview EFIS system.
First came the pitching of the prop. To start with the RV-12 needs to be level from front to back and the prop need to be level from side to side. The new instructions for this are listed on page 47-07 ( the page says revision 0.) Then each blade is pitch to 71.4 degrees. Making sure to check pitch through the torquing of the prop bolts. Next was job was to installed the spinner using page 47-05 as a reference.
Reference: SB 14-05-22
Having previously installed the canopy safety switch, I wanted to check the operation of it at least with the engine not running. There is also a check that will be done after the first engine startup.
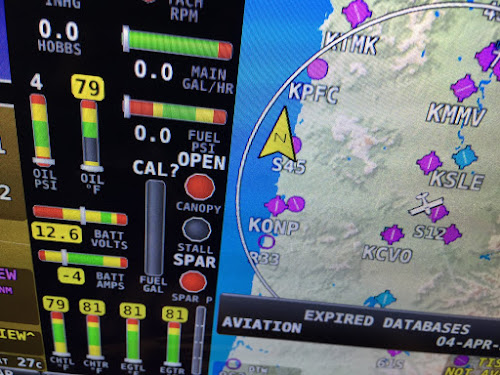
Reference: page 46-14 With the EFIS up and running it was a good time to complete step 4 on page 46-14. It calls for checking the Oil Sensor is set to the Rotax 456180 sensor. Mine was set to a different sensor, but was an easy change in the SETUP MENU.
Next I wanted to check that the EGT sensors had not ben swapped on my RV-12. So I heated the left sensor up using a 100 watt light bulb and looked for the increase on the left read out. My plane is set up correctly. I can't remember which Notification discussed this from Van's.
Next came registering the map license on the Skyview. It requires going to Dynon's website and using the certificate that came with the Dynon and registering it. They then send a code back to be entered into the EFIS system. Note: it does take a couple of days to get the code from Dynon.
Reference: Page 53-10 set up of A-DSB
I had installed the A-DSB receiver earlier in the building process. It is now time to set it up. After rolling the RV-12 outside so it could sense the GPS network. I went through the process as outlined by Dynon. And check it's operation.
So that finishes this work session on the RV-12 airplane.
Subscribe to:
Posts (Atom)